By: David Vannier
If you do research on the web, have been to the AAW symposiums, go to any of the other symposiums, or even talk with other turners, you will hear all kinds of different techniques for drying wood. Any turner that starts with woods from our “urban forest” will have opportunities to start with wood that can be very wet. Most of us start by turning wet wood to finished products. This is much easier to learn to turn, and much shorter time to obtain feedback. The downside is these vessels tend to move as they dry. Some woods have significant movement, and can produce rather ugly turnings. Properly planned, you can produce vessels that move and create beautiful pieces. I personally prefer functional pieces to be what I turn, not how the wood wants to move. So I need to be able to dry wood for these pieces.
I will try to describe my understanding and experiences with these processes in this white paper. I have NOT done controlled experiments or collected data across a wide variety of wood types. Please do NOT take this as gospel, but just documentation of my current thoughts and the processes that I use. One of the nice things about turning (other than segmentation) is that you don’t have to engineer it too much. After retiring from the semiconductor industry, I’ve enjoyed not being too scientific, so I’ve probably avoided running true controlled experiments and collecting data. Many people make claims, but the “data” that they give shows that it is mostly anecdotal rather than really controlled experiments. This doesn’t mean that their conclusions are wrong (or right), just that it is easy to argue and debate or see significantly different results.
I’ll at least introduce the other techniques that people use, along with my experiences, or lack thereof. If you want more info, a quick search on the web will point you to the latest info on any of these methods. In the end, use the technique that you are the most comfortable with.
Where to begin……
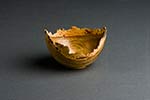
Start by rough turning your vessel. Leave the wall thickness at ~10% of the diameter. I personally never go past 1 ¼” in thickness. So once I go past 12” diameter, I violate the 10% rule. I have had problems with cracks regardless of what process I use when the vessel is too thick. Occasionally I do have problems where the vessel is cannot be turned again, due to the wood moving enough that the wall thickness is not enough. I don’t have any data collected on this, I throw them away.
Now it is time to dry the turnings so that they will be stabilized and ready for final turning. I use 3 different processes, boiling, bagging, and sealing. Why not just 1? If you could see me right now, you would see me shrug my shoulders. It’s a different day, I felt like doing this today. I’ve had reasonable success with these 3, so this is what I do.
Boiling:
I think this would be THE process that I use when I’m doing batch turning. The process requires that you boil the rough turnings in water for at least 1 hour per 1” of thickness. Boiling longer will not harm things. You must be careful to not have the turning jam in the pot and act like a steam pot lid. If it does, it could explode. This would not be good. Do NOT do the boiling in the kitchen with a pot that you would like to continue using for something other than boiling wood. The pot will not be usable for anything other than boiling wood. John Brugo use to boil our turnings in an old water heater tank outside. So you need a good heat source and a large pot. Turkey boilers, crab pot cookers, etc make great sources for heat. You can get large pots for a reasonable cost from Smart & Final. Jim & I are going to try taking one of the 55 gal Anchor Seal drums and make a boiling pot from that. The vessels need to be completely under water, or at least such that they would be covered if the vessels touched the bottom. If you boil for an extended period of time, you may need to add water. You would not want to have any more water than required to minimize costs. Once done boiling, allow the vessels to cool in the tank overnight. Do not remove from the water till the water has reached the air temperature. If you remove them too quickly, the pieces will crack. Sad to waste this much time to have this happen. Set the vessels out and allow them to dry. I’ve found in all cases that limiting the air flow (no controlled data collected) in the first 2 or 3 weeks reduces the cracking. I’ve found that most woods dry in roughly ½ the time of non-boiled woods. This technique is the only thing that I’ve had any luck with for Madrone. I’ve never tried it with Olive, so can’t say if it would work or not. There will be some surface dis-colorization, but it does not go very deep, and turns off when you do the final turning. When I’m doing one or two bowls, it is just too much work to set up and boil. But if I got a lot of wood and do some serious turning, I will set up a tank, and dump the rough turnings in the tank and start boiling when I’ve finished turning. In summary, the cons are that this is relatively expensive to get set up and a fair amount of work for one or two vessels. The pros are that it is what I’ve had the best success with for limiting cracking and it does make woods dry faster.
Bagging:
This process is something that takes constant supervision. After rough turning, I will place the vessel in a brown paper bag. If the humidity is low, I will use two or three bags for the first couple of weeks, and then reduce to 2 bags for a week, and then finally 1 bag. If the wood is very wet, you will need to change the bags every day till the bags are not wet the next day. If you don’t change the bags, the wood will rot, not good. I keep these bagged vessels on the floor of the shop, with no air flow. After a couple of months, I will move the vessels onto a rack to allow them to finish drying. These vessels can take 6 months to 2 years to dry, depending upon the type of wood. Walnut usually dries in 3 to 4 months. Maple has been closer to 6 months. Do not use plastic bags. This does limit the drying, but it does create an environment that is likely to cause the wood to rot. I’ve tried wrapping newspaper around the pieces and using masking tape to hold it together. Don’t do this till you don’t have to change the bags daily, just too much work. Rather than just leaving them out of bag completely, this is a way to continue to control the drying (not accelerating, but slowing). The cons of this process are that it takes lots of attention, and does not dry things quickly. If you accelerate the drying time, you will increase the probability of cracks. The pros are that it is cheap. A great recycle of bags from the grocery store.
Sealing:
After rough turning, I put a single coat of anchor seal on the outside of the vessel. Then set the vessel aside in an area with little or no air flow. After a month or two, I will stack them on a rack where they can continue to dry. If the wood is a variety that tends to have significant movement, I will put two coats on the outside, and one on the inside. This slows the drying significantly. This process can be combined with bagging when I feel like it. Why? Because. Don’t ask, I don’t know! The cons of this are that it can cause it to take forever to dry. I have some Walnut that is 18 months old now, and still wet. The pros are that I really only have to deal with it a couple of times, so it takes the least amount of my attention. Jim also likes it because I use more Anchor Seal.
How do I know if it is dry?????
Before I talk about the other processes that are being used by others, let’s talk about the one thing that you’ve probably wondered “How do I know if it is dry?” You could go out and buy a moisture meter. But good meters can be expensive, and to get accurate readings you need to poke holes in the wood. In addition, dry is a relative thing. Dry in Phoenix and dry in Hawaii are radically different. It all has to do with the moisture content of the air. If the moisture level varies radically over the year, the wood will swell and shrink over the year. So exact moisture readings are not exactly what you are looking for. Might make us geeks feel good, but not particularly meaningful.
I use a very simple method, an electronic fish scale with a net basket. I weigh the wood, and when it stops losing weight, it has reached equilibrium with the air. After rough turning a piece, I weigh the piece and mark it. My marking includes the date weighed and the weight. It is that simple. I looked for an old scale from a grocery store, like you find in produce department, either hanging or on a shelf, but didn’t find one cheap enough. Any scale that reads oz’s and up to 20lbs or so is fine. It doesn’t need to be accurate, but does need to be relative, meaning that if it tells you that 1lb is really 14 oz. it needs to be 14 oz. every time. All we are trying to measure is that it has stopped losing weight, not how much it weighs.
What about other techniques that I’ve heard about?????
The list of methods to dry wood is endless, and it seems that I hear about a new method every couple of months. Some I really have to what in the world made you try that? I’m certain if we get some chemists and biologists together we might find “the solution”, but since there isn’t any money in this, I’m not sure why this would ever happen. In any case, here is a list of a few more methods that you might hear about or want to try:
Vacuum drying Kiln drying Microwave drying Freeze drying Alcohol drying (DNA) Soap Drying (LDD) PEG
Vacuum Drying
This is something that is being done commercially in Europe, and some here in the US. It involves using a combination of heat and vacuum to dry wood. We have some local people that are using this to finish drying dry wood. The basics of this are fairly simple, as the pressure is reduced, the boiling temperature of water comes down. By lowering the pressure enough, you can make water boil at room temperature. The water turns into vapor and is removed from the wood. I had the bright idea of trying to build a vacuum kiln, as the commercial sites claim to be able to dry wood in a few days rather than months. My experiments all have failed so far, and I “think” I now understand why. This winter I will run the experiment again and see if it will work. For now, I’ve concluded that if you want to dry wood below equilibrium, then this is a good method. If you want to take wet blocks of wood, I’m not sure it will be practical.
Kiln drying
This is the commercial method for drying wood. A number of turners have created kilns which are relatively cheap to operate and build.
Microwave Drying
Don’t do this with the microwave in your kitchen. Some wood create strong odors. The process is rather simple. Wrap you piece in paper towels. Place in the microwave and use the defrost cycle. The time varies depending upon the size/weight of the piece. You need the piece to get hot, but not too hot. Start with short times and work your way up. If you get it too hot, it can catch on fire. I’ve got a piece of walnut that burned from the inside out. I went one cycle too far. So DO NOT leave this unattended during or AFTER a cycle. Make sure that the piece is completely cooled before ignoring it. After a defrost cycle, leave the piece wrapped in the paper towel to cool. This will reduce the probability of the piece cracking due to the surface drying too fast. You will have to run this cycle a number of time, with roughly 5 minutes or so between cycles. I’ve not had a lot of luck with this, but Gordon Rockhill has been very successful with this, so I would recommend talking with him if you want to experiment with this.
Freeze Drying
We had a very famous turner come from Canada and demo at our club several years ago. During his demo, we had a discussion about freeze drying. He asked the very simple question “How come all the trees in Canada still have to be dried? It gets plenty cold doesn’t it?” Seemed to make sense to me, so I really wasn’t interested in this. I do know that a number of people will through pieces in the frig/freezer to hold the moisture if they get interrupted. I had a piece of Apricot, which has a very bad habit of moving and cracking. I didn’t have time to turn it when I got it, so I put it in a bag, and threw it in the freezer. About a year or so later I “found it”. Dry as a bone, and very stable. It hadn’t even been rough turned. So, I do think that Freeze drying does work. No idea how long it would have to be in the freezer. But this definitely isn’t practical for any significant amount of wood.
Alcohol drying (DNA)
This method uses the alcohol to replace water in the wood. The alcohol then evaporates faster than water wood, accelerating the drying process. DeNatured Alcohol is used, hence the name DNA. The length of time that the wood must be soaked in the alcohol is dependent upon the thickness. I allowed the piece to sit and soak overnight. Then I removed the piece and let it dry, which was only a few days. I don’t use this because it takes a fair amount of alcohol to cover a large piece, which translates to $$$. There is some debate about how long the alcohol can be used. Some say it doesn’t go bad, others say it gets diluted by the water that it is replacing and loses its effectiveness. I’ve heard others also have problems with it developing a scum that affects other pieces.
Soap drying (LDD)
This method has been discussed at AAW and several other symposiums. A turner from Hawaii came up with this. He uses Liquid Dish Detergent (LDD) from Costco. The wood is soaked or coated with a diluted solution of the LDD with water. I’ve seen articles everywhere from a dilution of 1 to 1, to 1 to 6. I’ve not experimented with this technique, but have been thinking of trying it, just to see. Bill Johnston has been using this process. The claim is that the soap replaces the water in the cells of the wood, which is the part of the drying that takes the longest. Benefits are suppose to be easer cutting and sanding after drying, as well as stronger wood if applied to dry wood, reducing tear out. All would be great benefits. Some discussion of negatives has been that it does not prevent cracking and that it can leave the wood smelling like LDD. I’m going to give this a go and see what happens.
PEG
This is the one method that I would NOT recommend. PEG is a commercial product that you can buy that stabilizes the wood. When it first came out, it was a rage, and most of us bought some. When applied as per the instructions on the can, the chemicals would replace the water and harden in the wood. But, the down side is that it does cause problems with finishes. Finishes that are suppose to soak into the wood, like oils, have a very hard time penetrating, so you end up with a spotty coverage. Surface finishes have a hard time sticking to the wood. Bottom line, not good. I’ve got a can of it if anyone wants to try it, let me know. Why I don’t throw it out, is beyond me. Guess I’m a collector.
Summary:
I’m sure that it will be impossible to keep this up to date, as people are constantly trying to find new ways to address this need. If you try something and it works, write it up so others can learn from you as well.