WBAW - Bill's Finishing Notes
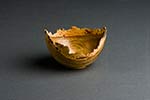
'Salad Bowl Finish'
'Salad Bowl Finish'
Notes on the Glossy Oil Finish
Step #1.
Room temperature and humidity affect results (warm and dry is best). Sand to 320 grit. Rub on finish until absorbed. Surface should appear dull and nearly dry. Approximately 5 to 10 minutes. Let dry at least 24 hours. After dry and if necessary, apply CA glue to fill cracks, dental tool is useful for removing air pockets, sand with 180/220 grits.
Step #2.
Sand with 320 grit. CA glue should only be in the crack. Rub on finish until absorbed. Surface should appear dull and nearly dry. Approximately 10 minutes. Let dry at least 24 hours If necessary, apply CA glue and fill cracks, sand with 220/320 grits.
Step #3.
Sand with 400 grit Rub on finish(wipe off excess of piece does not absorb all of the finish). Surface should appear dull and nearly dry. Approximately 10 minutes. Let dry at least 24 hours (48 hrs is better).
Step #4.
Sand with 400 grit. Wipe on thin even coat of finish. Apply constant pressure. Turn table works well for a large piece. Shake or spin piece to level finish. Let dry at least 12 hours. Piece should have a dullish semi-gloss appearance. An uneven appearance (some parts dull and others shiny) justifies repeating this step. Sand with 320 and repeat.
Step #5.
Sand 400 grit. Wipe on thin even coat of finish. Apply constant pressure. Shake or spin piece to level finish. Let dry at least 12 hours. Piece If not, repeat this step.
Step #6
Sand with 400 grit. If there is a run in the finish try wet sanding and let dry overnight. Wipe on thin even coat of finish. Apply constant pressure. Shake or spin piece to level finish. Let dry at least 12 hours. Piece should have an even semi-gloss shine. If not, repeat this step.
Step #7
Rub with #0000 steel wool. Wipe on thin coat of finish. Apply constant pressure. Shake or spin piece to level finish. Let dry 12 hours and check gloss. Repeat this step if gloss is uneven. Fully cured in 30 days